Install Chef 360 Platform Server
This procedure installs Chef 360 Platform Server embedded in a single-node Kubernetes cluster. Chef 360 Platform operates in an underlying Kubernetes container that’s opaque to the user and extends and scales automatically in the background.
Prerequisites
- a Chef 360 Platform authorization code
- a Chef 360 Platform license
- an active internet connection
Requirements
Review the system requirements before installing Chef 360 Platform Server.
Install
To download and install Chef 360 Platform:
Download the Chef 360 Platform installer:
curl https://replicated.app/embedded/chef-360/<RELEASE_CHANNEL>/<RELEASE_VERSION> -H "Authorization: <AUTHORIZATION_CODE>" -o chef-360.tgzReplace:
<RELEASE_CHANNEL>with the release channel.<RELEASE_VERSION>with the Chef 360 Platform version. This is optional. If omitted, the latest version is downloaded.<AUTHORIZATION_CODE>with the authorization code provided by your solutions architect.
Extract the installer:
tar -xvzf chef-360.tgzInstall Chef 360 Platform:
sudo ./chef-360 install --license license.yamlDuring the install process, the installer prompts you to enter a password and you are given a link to the Admin Console:
? Enter a new Admin Console password: ********
? Confirm password:********
Node installation finished
Storage is ready!
Embedded Cluster Operator is ready!
Admin Console is ready!
Admin Console accessible at: <LINK>
Configure Chef 360 Platform
Log into the Chef 360 Platform Admin Console using the link returned when the Chef 360 Platform Server was installed. If the Admin Console in not accessible from the IP address in the link, replace the IP address in the link provided during the install process with the public fully qualified domain name.
The installation configuration screen appears.
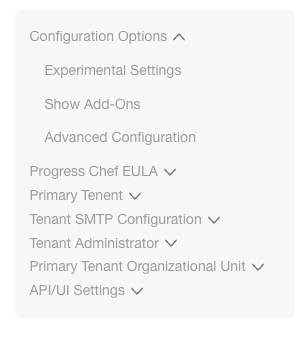
Configuration Options
To continue with the full setup of settings and options, select Advanced Configuration, then accept the terms and conditions.

Tenant setup
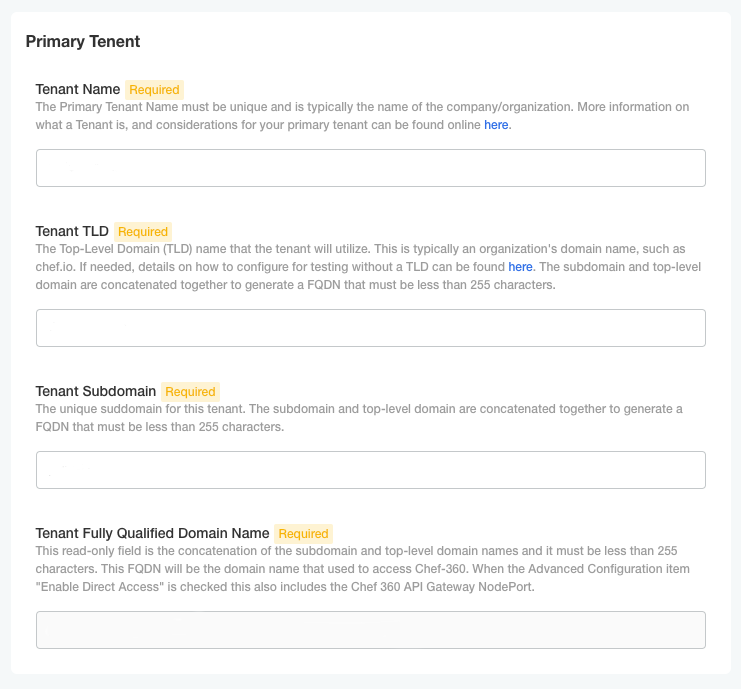
This section outlines how to define your tenant setup information. You must verify your operating DNS to keep it aligned with your company’s configuration.
In the Tenant Name field, enter the name for your default tenant.
Note
Chef 360 Platform doesn’t allow underscores (_) in the tenant name.In the Tenant TLD field, enter the top-level domain (TLD) name for your tenant. This is based on the DNS you have reserved for use with the Chef 360 Platform.
In the Tenant Subdomain field, enter the unique subdomain for this tenant. This is based on your DNS routing for Chef 360 Platform.
Verify the Tenant Fully Qualified Domain Name field. This is a read-only section to verify that both of the previous settings are correct based on your DNS entries.
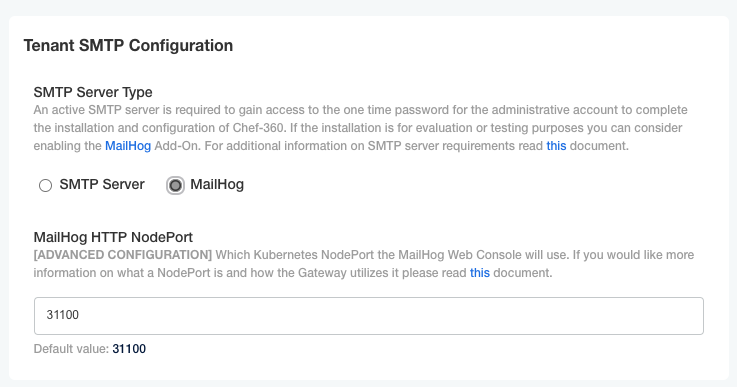
Tenant SMTP configuration
As an add-on, Chef 360 Platform allows you to use the MailHog mail server. When the installation is complete you must review the MailHog configuration.
If you have chosen to use the MailHog configuration you must update the MailHog HTTP NodePort port setting if you decide not to use the default port. Do this after the initial configuration of the server.
Note
SMTP setup
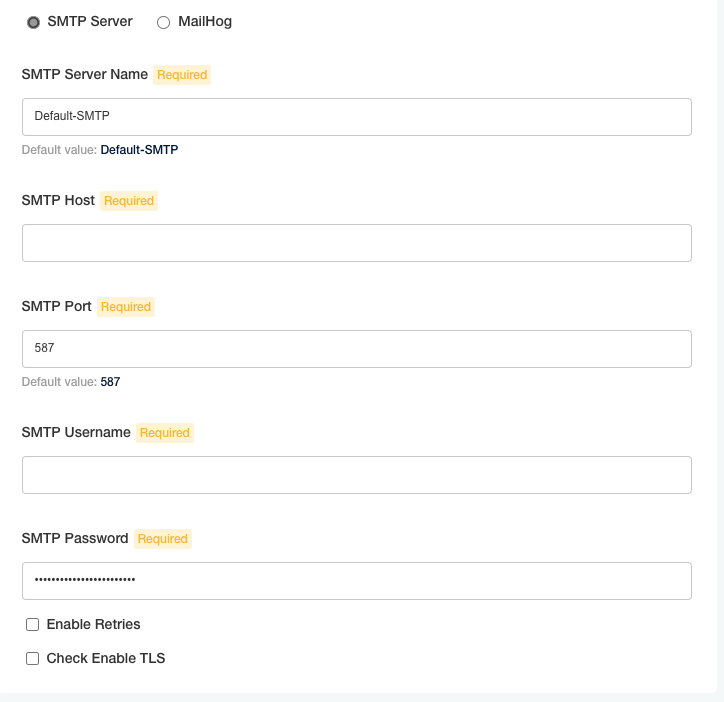
If you choose to hook up your current SMTP installation, configure the these settings based on your server configuration:
- In the SMTP Server Name field, enter the SMTP server name.
- In the SMTP Host field, enter the SMTP host.
- In the SMTP Port field, enter the SMTP port. The default port is
587. - In the SMTP Username field, enter the SMTP username.
- In the SMTP Password field, enter the SMTP password.
An acceptable user and password must be configured in the SMTP server. This is used to send introduction emails to Chef 360 Platform users.
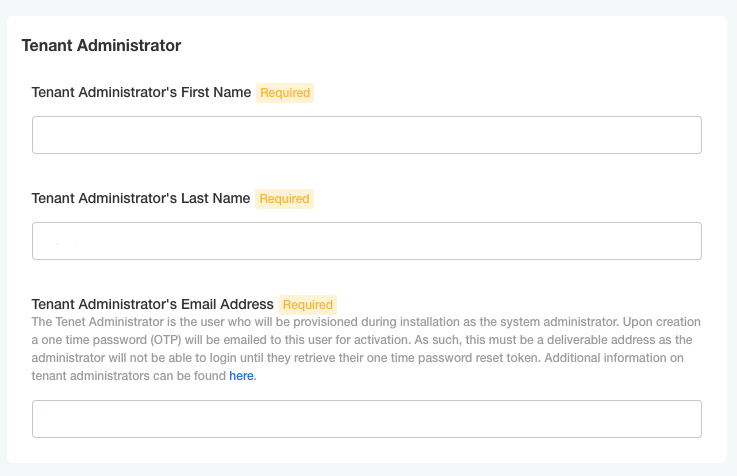
Tenant administrator
All Chef 360 Platform deployments require an admin to work with the platform. To configure the default administrator, follow these steps:
- In the Tenant Administrator’s First Name field, enter the tenant administrator’s first name.
- In the Tenant Administrator’s Last Name field, enter the tenant administrator’s last name.
- In the Tenant Administrator’s Email Address field, enter the tenant administrator’s email address.
Primary tenant organization
All Chef 360 Platforms require a default organization. It’s not easy to change this after saving the configuration.

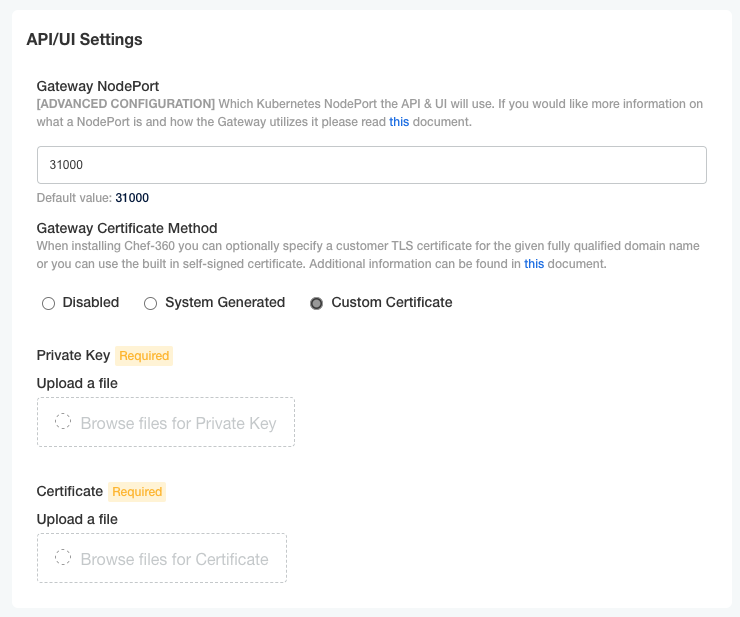
API/UI settings
Companies can choose to configure the Chef 360 Platform with a Chef-generated certificate or with a customer-generated key. We recommend providing a secure token.
Set the Gateway Node Port based on your needs. The default value is 31000.
Select a Gateway Certificate Method:
- Disabled: This setting isn’t recommended.
- System Generated: This allows the Chef 360 Platform to generate a private key and certificate.
- Custom Certificate: You can upload a certificate and private key for use with the Chef 360 Platform.
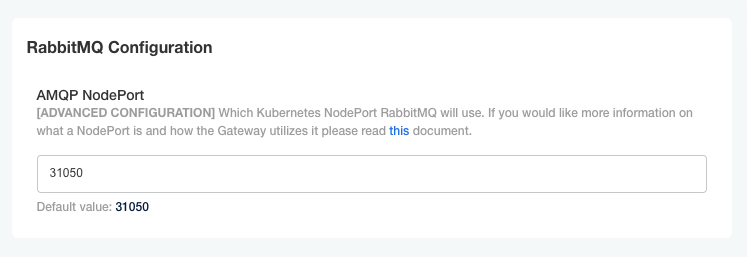
RabbitMQ configuration
In the AMQP Node Port field, specify the port needed to communicate with RabbitMQ. The default port is 31050.
Save configuration
Verify that all settings are correct for the initial setup and then select Continue.
Deploy Chef 360 Platform
After you save your configuration, Chef 360 Platform runs preflight checks to verify your settings.
If there are warnings, verify that all requirements have been met. If there’s a missing setting, correct the setup and select Re-run. If you are confident that the settings are correct, select Re-run deployment and clear the indicator with Deploy anyway.
If all preflight checks pass, select Deploy.
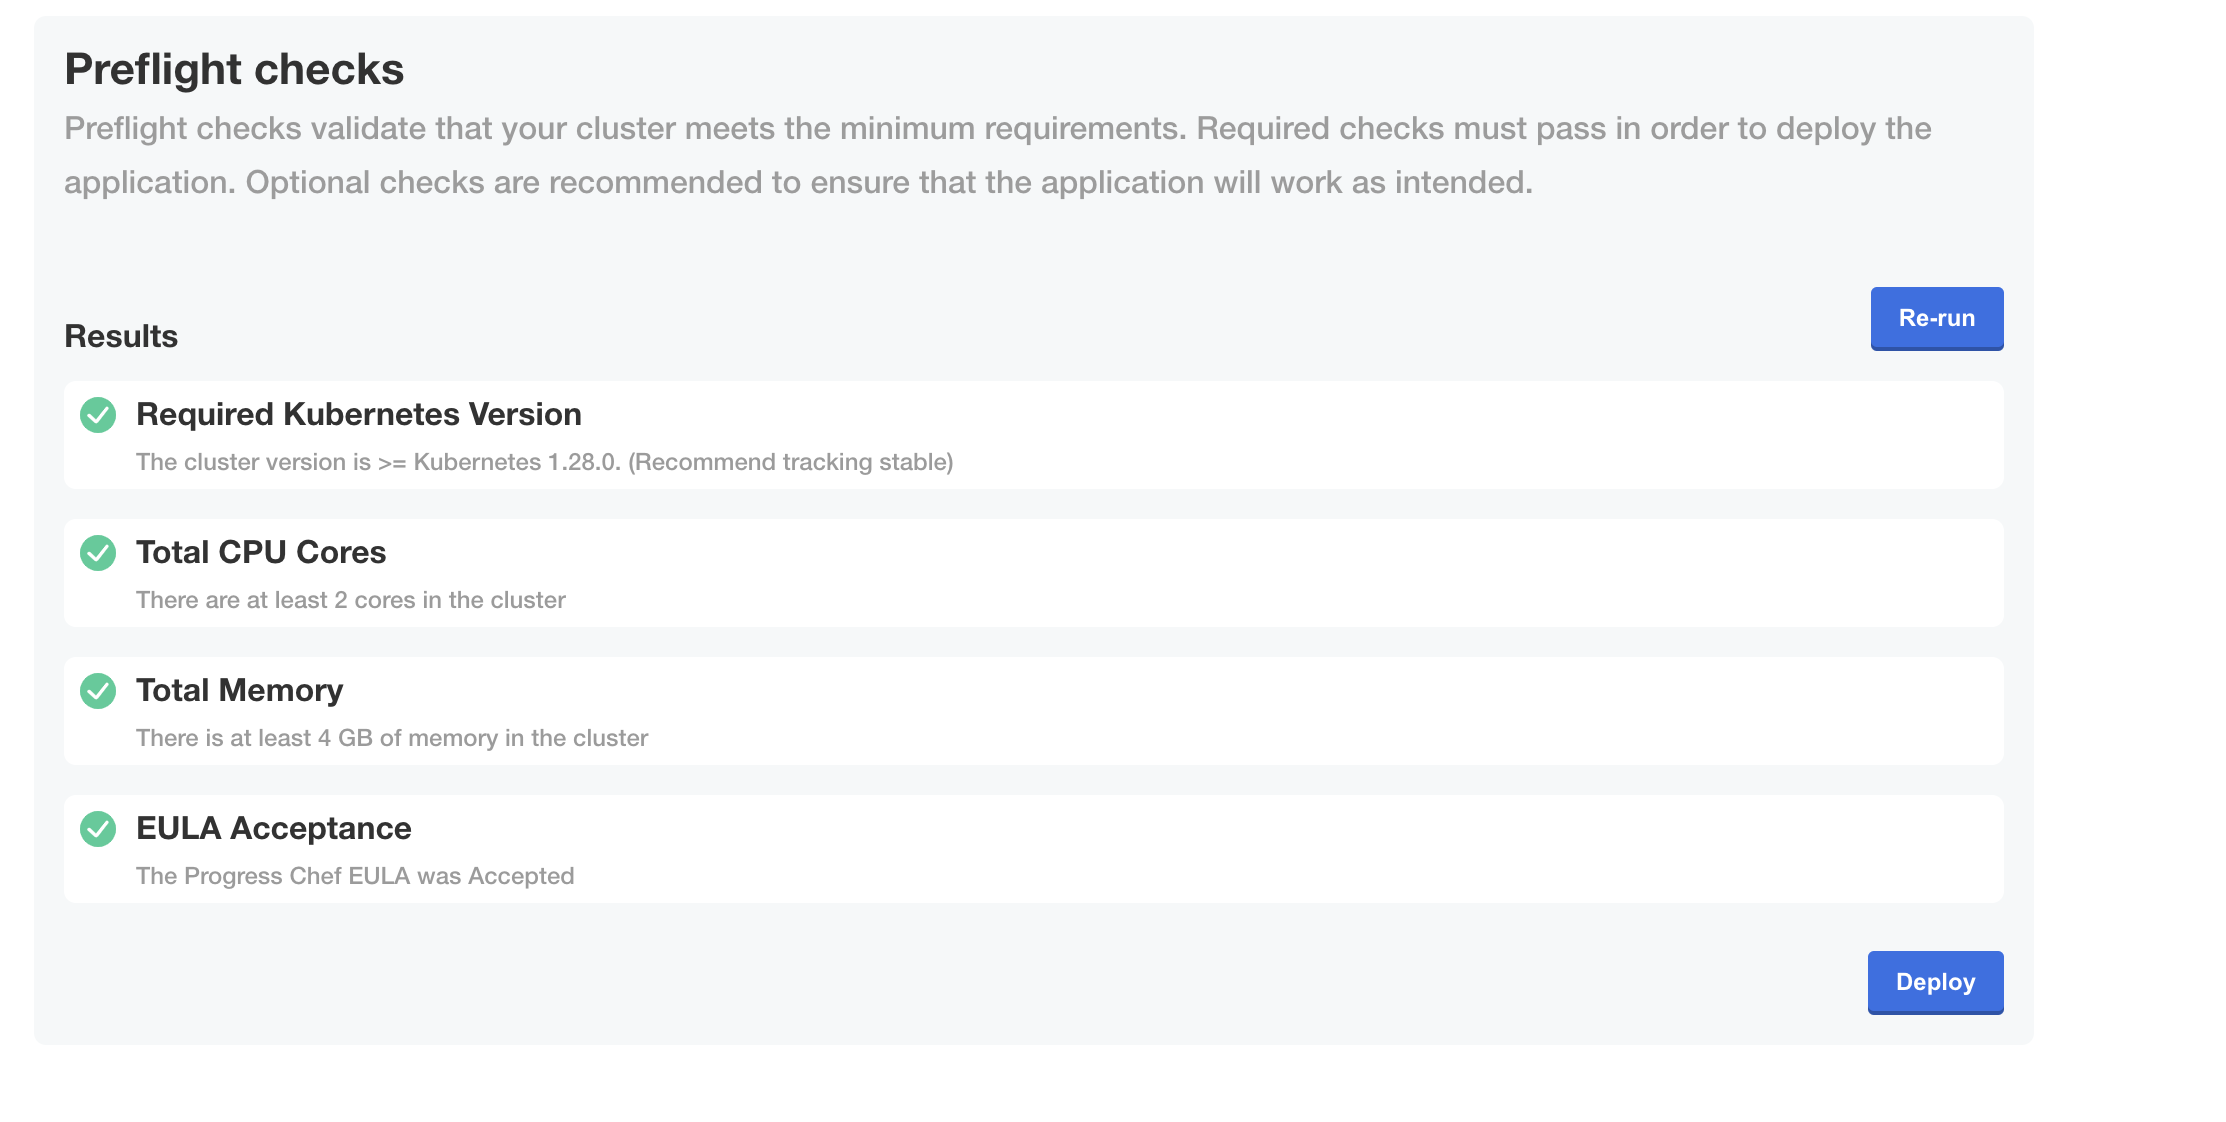
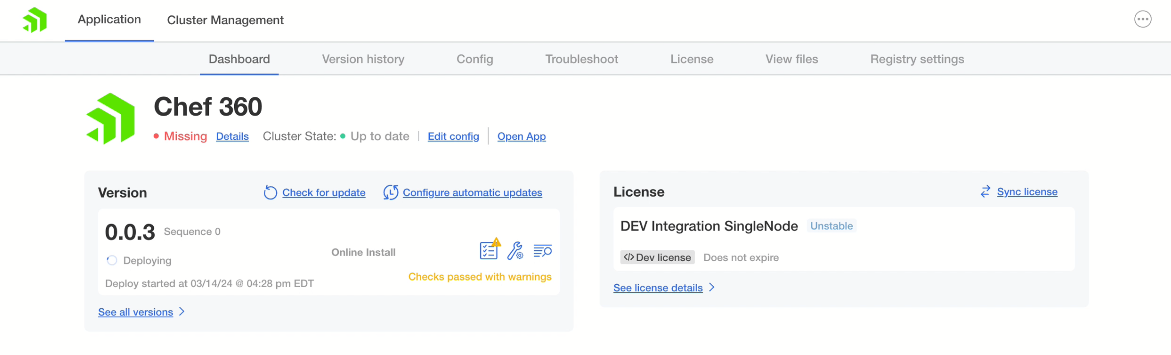
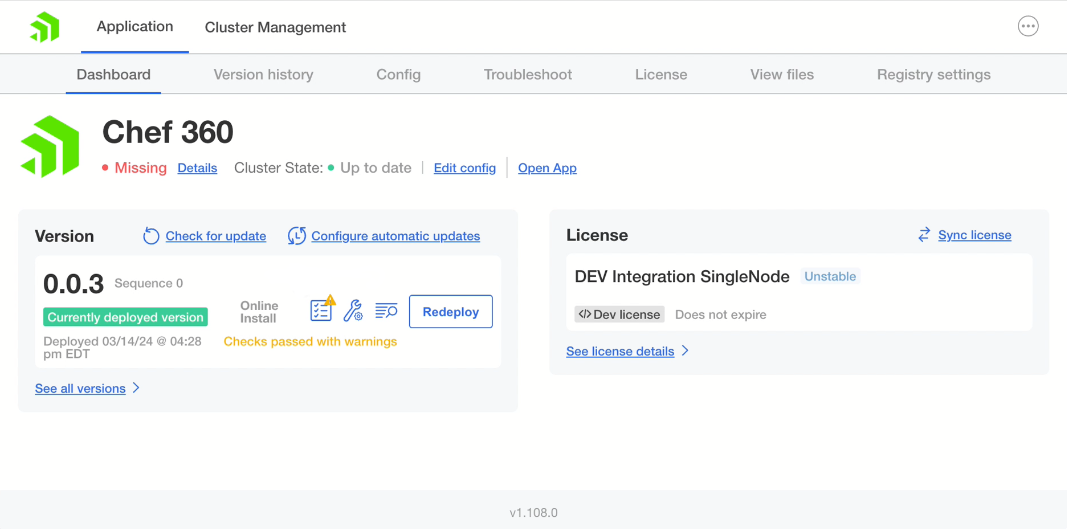
After deploying the Chef 360 Platform administrative console dashboard displays and the cluster status is Deploying.
When the deployment is complete, the cluster status updates to Currently deployed version.
Chef 360 Platform is now installed and you can start using it. Refer to the following sections for details on how to upgrade Chef 360 Platform.
Additional Chef 360 Platform settings
Enable automatic updates
Chef 360 Platform can automatically update itself. You can schedule how often it checks for updates and the release types it will automatically update, for example check daily and update patch releases only.
To enable automatic updates, follow these steps:
Log in to the Chef 360 Platform Admin Console, select the Dashboard tab and then select Configure automatic updates.
In the Configure automatic updates dialog, enter the interval to automatically check for updates. You can choose a predefined interval from the menu or create a custom interval. Then select the type of updates to automatically deploy, for example just patch releases. Then select Update.
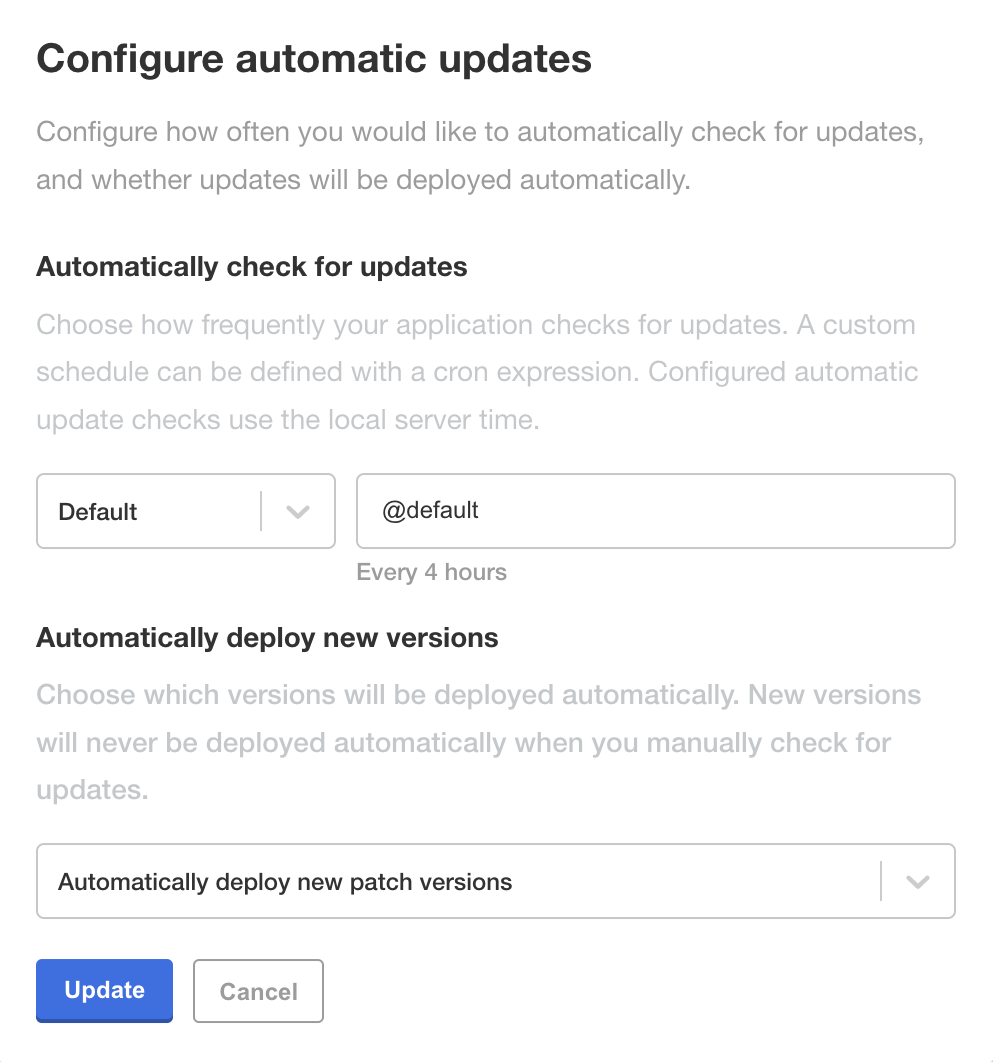
Automatic updates are enabled.
For more information, see the automatic updates and cron reference documentation.
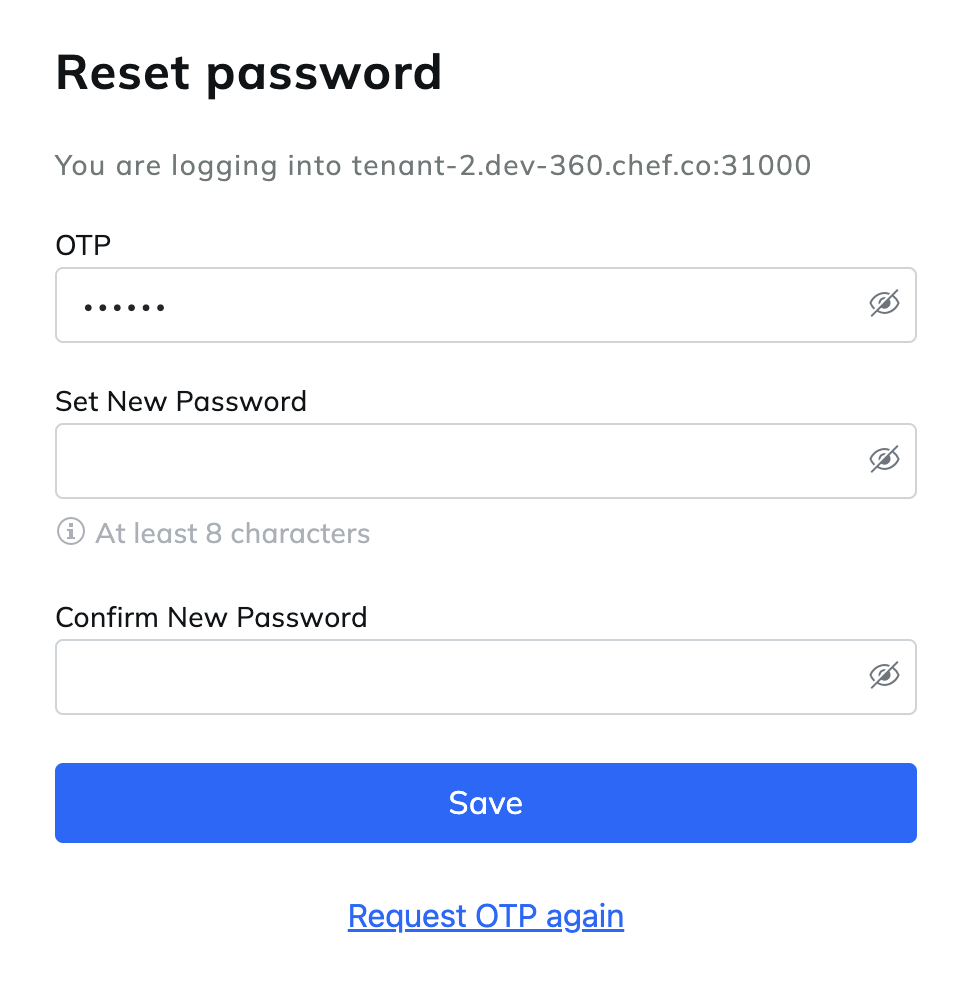
Set an administrator password
After you install and configure Chef 360 Platform, it sends an email with a link to set an administrator password. You have five minutes to open the link in the email and set the password. If your one-time password expires, you can create a new one.
If you set up Mailhog, you can access your email in Mailhog from http://<TENANT_FQDN>:31100.
To set an administrator password:
Open the link in the email and create a password with at least eight characters.
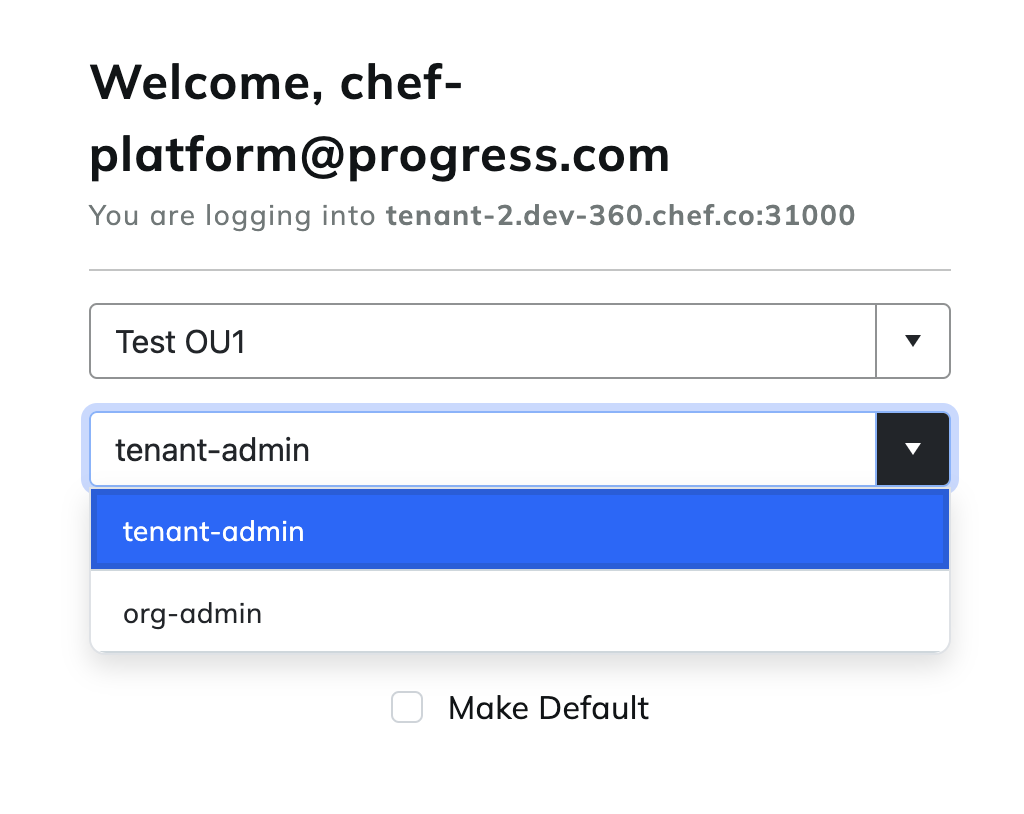
Log into Chef 360 Platform.
Select your organization and role from the menu to create a user and an organization.
Generate a new one-time password
You can generate a new one-time password link if your previous one expired.
To generate a new one-time password:
Go to
http://<TENANT_FQDN>:31000/app/login/forgot-password, enter your email address, and select Forgot Password.Chef 360 Platform sends an email to your email address with a link to reset your password.
Open the link from the email sent by Chef 360 Platform. In set your new password with at least eight characters.
More information
Next step
- Install the Chef 360 Platform CLIs on your workstation.